
Metadata Editor user manual
Learn how to edit EXIF, IPTC, GPS and photo metadata on your iPhone or iPad.
Technical questions
Answers about dates, image orientation, Photos, locations and how edited files are saved.
Why can’t the date be removed?
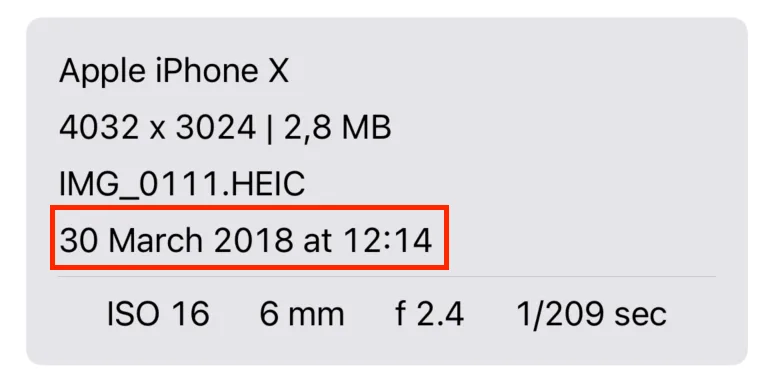
The date of a photo appears in multiple places: in the metadata and in the file. The date in the metadata can be removed, but the date in the file itself, which shows up in the gray summary box, cannot be removed entirely. This is because any file within an operating system must have a creation date. You can change this date, but it can’t be removed completely.
Why is the image rotated or does its size change when edited?
Apple requires third-party apps that are saving an image to Photos to save the edited image as JPEG and with orientation up. See Apple’s Developer Documentation for more information. Due to this, after editing an image you might see that the width and height have swapped positions. Your image should look the same to you. If it does not, please contact support.
Why don’t the metadata changes appear in the Photos app?
Apple’s Photos app keeps a separate metadata database. When you add a photo to your Photo Library, Photos will read the metadata of the photo. This metadata will then be displayed in the Photos app:
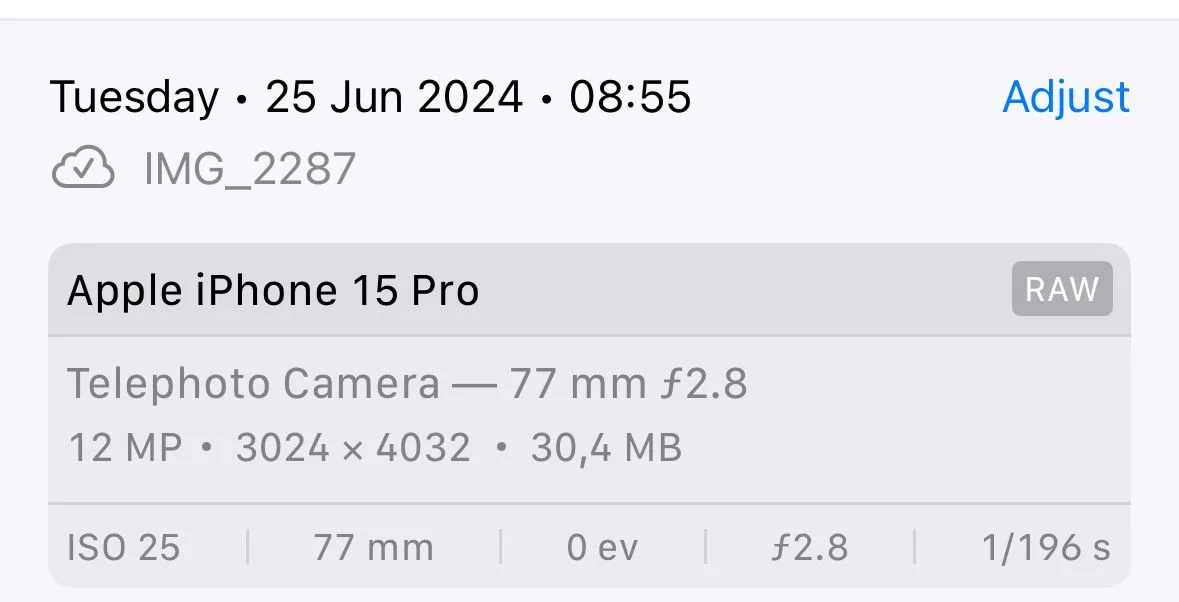
When you modify an existing photo, in Photos you will still see the old values. This is because Photos only reads the metadata from the photo file when importing a new photo.
If you want to see the updated values in Photos, you will need to change your Saving Strategy, so that when you edit a photo with Metadata Editor it saves the updated image as a copy. Doing this will make Photos import the new image and read the updated metadata. To change the Saving Strategy, follow these steps:
- Go to Metadata Editor and tap the Settings button (top-left).
- Select Saving Strategy.
- Enable Save edited photos as a copy.
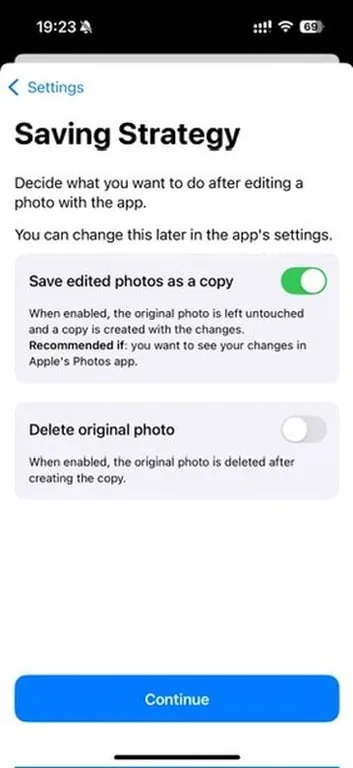
Now, every time you edit a photo, it will be saved as a copy. If you want to avoid having duplicates (the original + the edited copy), you can turn on Delete original photo.
Note that using this Saving Strategy will prevent you from restoring back to the original image.
Why are photos saved as JPEGs?
This is a limitation from Apple, where edited images need to be saved as JPEGs. This is the only option at this time. Due to images being saved as JPEG, you might see the edited image being a lower file size than the original one.
See more in Apple’s technical documentation.
Why can’t I see the location of a photo?
Metadata Editor can only show the location of a photo if that information is stored inside the photo file. Metadata Editor is not able to detect or find the location of a photo by looking at the picture. Instead, it relies on metadata information that is embedded in the photo’s file. If that metadata is not present or has been changed, Metadata Editor cannot find the original location where that photo was captured.
Batch editing
Select several photos and control how Metadata Editor applies keywords across a collection.
How can I select multiple photos when batch editing?
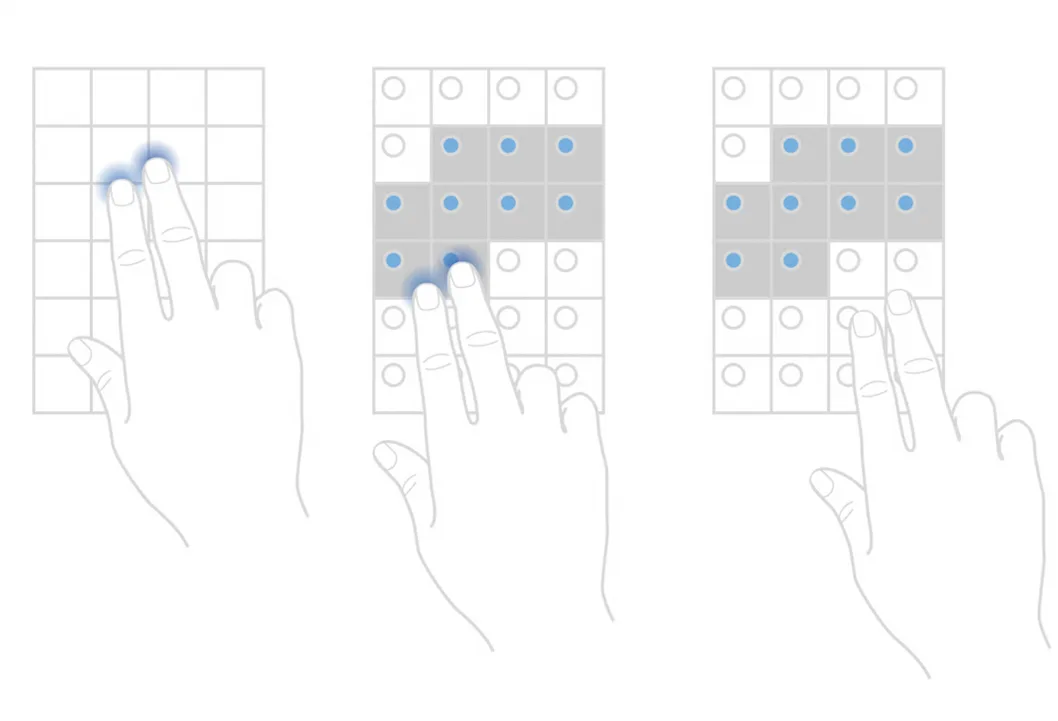
To easily select multiple images you need to use the following gesture, once you are in batch editing mode:
Tap with two fingers, and then scroll across all the images you want to select. When you have selected all the images you want, simply lift your fingers from the screen.
Why are keywords replaced when batch editing? How can I append new keywords?
By default, batch editing keywords will replace the existing keywords with the new input. If you want to append keywords instead, you can enable an advanced setting. Follow these steps to enable it:
- Open Metadata Editor and tap the Settings button (top-left).
- Go to Advanced.
- Enable Append keywords when batch editing.
In-App Purchases and Subscriptions
Manage trials, subscriptions and refund requests securely through Apple.
How do I cancel my trial?
Subscriptions and in-app purchases are handled by Apple. To cancel an active trial, follow these steps:
- Go to the Settings app > [your name] > Subscriptions.
- Tap a subscription, then tap Cancel Subscription or Cancel All Services.
You can find more information on Apple’s support website: View or cancel app subscriptions on iPhone.
How do I cancel a subscription?
Subscriptions and in-app purchases are handled by Apple. To cancel a subscription, follow these steps:
- Go to the Settings app > [your name] > Subscriptions.
- Tap a subscription, then tap Cancel Subscription or Cancel All Services.
You can find more information on Apple’s support website: View or cancel app subscriptions on iPhone.
How do I ask for a refund?
Subscriptions and in-app purchases are handled by Apple. To request a refund, follow these steps:
- Sign in to reportaproblem.apple.com.
- Tap or click “I’d like to”, then choose “Request a refund”.
- Choose the reason why you want a refund, then choose Next.
- Choose the app or subscription, then choose Submit.
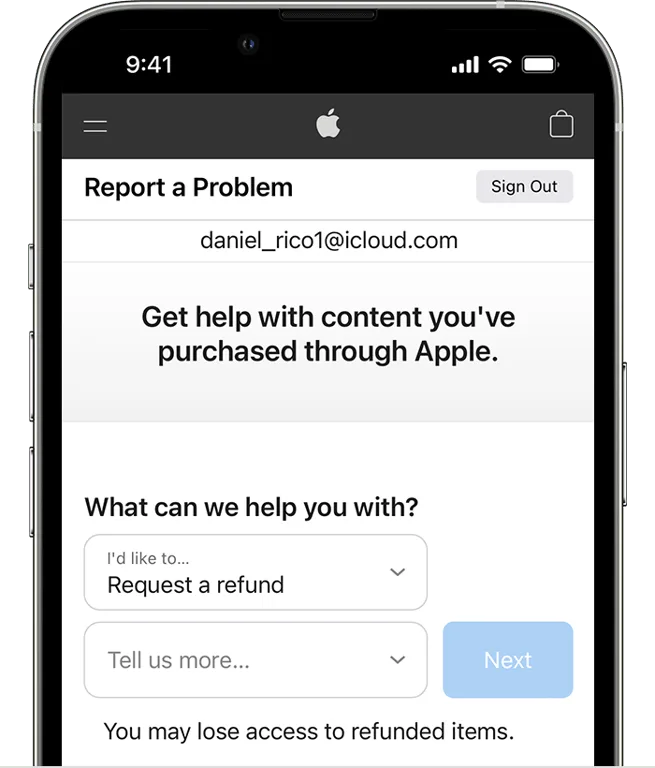
You can find more information on Apple’s support website: Request a refund for apps or content that you bought from Apple.
Still need help?
Behind Metadata Editor you’ll find Andrés and Anna. We’re only an email away.